Monday, December 10, 2012

Stocking Stuffers - Baby Zilla DIY


Photobucket


When my delightful sister Tamsyn asked me to participate in her handmade Christmas gift collaboration, I jumped at the chance. I have so many handmade gifts I want to get done and so little time!

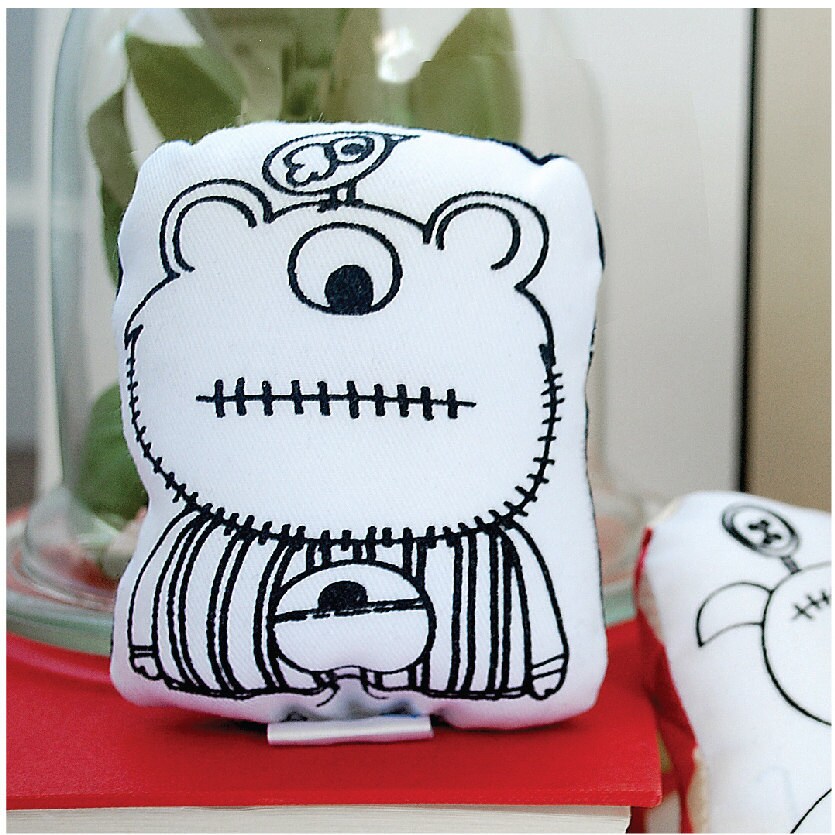
I decided to make this adorable little monster from Craft Schmaft. I picked up the paper pattern at the Finders Keepers Markets but you can get it online too!


The first step is getting some socks. It took me two goes to get this very simple bit right! You see unless you want your monster to have writing on his belly then you’ll need to find some blank socks. Of course I didn't figure this out until I started sewing my monster...

Luckily after a quick trip to Big W, I found a variety of suitable socks. You see I have four of these adorable creatures to make. One each for my girls and one each for my nephews. They're from Santa though so shhh don't tell :o)


You want to turn your sock inside out and make sure it's nice and flat. Whenever I cut the sock I lay pins just to the left of the cut line. This meant the layers all stayed together nicely. The instructions recommend leaving a gap at the end of the tail (the top of the purple line in the photo) but when I make more of these I will leave the gap in the middle. I think this will make it much easier to turn and stuff. Just make sure backstitch on either end of the gap if you do it this way.


Flatten out the sock so the sole is facing towards you. Trace out a curve for the top of the head. I used the top of another sock to get the shape. You could also use a flexible ruler if you want it to be a bit more accurate.


Pin along the seam line before cutting and then pin vertically before stitching.


Reflatten the sock to it's original shape. Measure from the tip of the tail to the seam line on the head. This is how long you want the spikes to be.


Either enlarge or reduce your spike pattern to get it to be the right size. Pin to your felt and the cut to size.


Cut from the tip of the tail to the seam line. Line up the flat edge of your spikes with the cut line, making sure the felt is sandwiched between the two layers. Stitch along the back of your monster. Then you can turn the sock through the opening you left.


Use the toe of the sock you cut off earlier for the chubby little legs. There was no pattern piece (that I could find) for the legs and arms. I cut them to fit scrap that was left.


Using the sock, repeat the process to get some monster arms. Sew around the outside of the arms and legs, then turn them to be the right way around.


Oh look, it's starting to look like a monster! Time to stuff! Stuffing through the tail was a very time consuming process, I recommend lining up a good tv show before you start. Once you have the body stuffed you want to stich it up. I think ladder stitch gives the best result for this. Now I'm not even going to pretend I'm some sort of hand stitching expert. Thank goodness for the trusty internet to show us how!


Stuff the arms and legs and then whip stitch them onto the body. Depending on how the stuffing is distributed and how big your arms and legs are will determine where they look best. Play it by ear and once you've got one side done make sure you line it up to the same place on the other.


For the face I used the same reduction in size as for the spikes. It ended up that the mouth was still a little big so I just cut it to size. Next stitch the pupils and teeth to the black felt. I'm not sure what the name of the stitch you use is (sorry) but basically you want to have a tiny bit of thread come through at the front and a line of thread between stitches at the back. Use the same method to attach the eyes and mouth to the body. Whip stich your final spike to the top of the head.


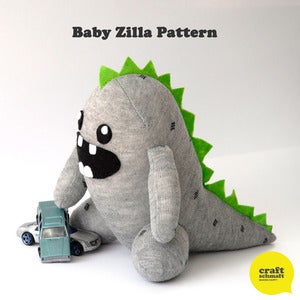
One finished little Baby Zilla. I have a feeling these are going to be a hit with the little people. It was easy to put together and would make a great gift for someone this Christmas :o)

Thanks for stopping by! I'm off to check out some of the other great gifts to make

Monday, November 12, 2012

Chowstalker Love!

Somehow, up until recently, it has completely escaped my notice that there is an awesome website called chowstalker.com

From their about page:
"Chowstalker is a place to find real food and connect with people who know how to cook it"

We've tried out a couple of recipes lately and been impressed with the results.


First up was Olive, Garlic and Lemon Chicken. We had this with green salad and the sauce made a great dressing. It was also good in that you use whole chicken thighs. This meant it was a hit with Ava who doesn't like olives or onions. I could just take out a thigh and it had all the flavour with none of the "bits". 


A few nights later we had Pollo Fundido. What's not to love about this one? Chicken and bacon in a creamy cheese sauce. If your stomach can handle the dairy then it's a guaranteed winner. We were all fighting over leftovers the next day!

So if you're into gluten free eating I highly recommend you check it out. Now I'm off to explore this thing called Dessert Stalker!

Wednesday, November 7, 2012

Finders Keepers

I was incredibly excited when I heard the Finders Keepers markets were going to be on in Brisbane last weekend. I've always wanted to go but the planets have never aligned!

Last week my sister and I disentangled ourselves from our offspring and headed off to the markets. It was a marvellous day. The weather was mild and the markets weren't too big. Perfect for Tam who is now 39 weeks pregnant

It was so hard to choose just a few things to bring home and I have dreams of going next time with a much bigger budget

My little haul

What I got...
The chalks are from One Lantern, but I'm not sure if they sell them online

An adorable fox brooch from Sharon Muir
All her ceramics were truly devine and I hope her online store opens soon

A rattle for the upcoming arrival from Amor Amor
Their items are made so you can colour them in with washable texta!

3 patterns from Craft Schmaft
I first pinned those balloons a while back and I was delighted to find
the patterns. You can get the PDF's online but if you get the chance to
see them in person their paper patterns are beautifully presented.

We made a quick stop in to Chermside on the way home so Tam could help me pick out an outfit from Portmans. She very kindly gave me a voucher for my birthday. We got a dress and some shoes, woot woot :o)

Photography by Ava. You can see me wearing my little fox brooch.

If you're on Instagram you've probably seen by now that they've put up profile pages. I'm loving it and if you want you can see us here Instagram.com/miss_jent 


Sunday, November 4, 2012

Countdown to Christmas

November is upon us and the countdown to Christmas has officially begun. This year's celebrations will be smaller that years past but there are still menus to organise and presents to buy.


My main Christmas planning tools this year are the above Chirstmas planner from kikki.K and of course my Pinterest boards.

I have a couple of main boards going. 
One for the kids: Stocking Stuffers
And one for in case anyone asks me what I want for Christmas: Wish List

My sister is a co-collaborator on the Stocking Stuffer board as we normally combine our talents to and make things for all the kids.

I also have a few projects hidden in and around various boards so as not to arouse suspicion from fellow pinners.

I'm planning quite a bit that's handmade this year and I need to get my butt into gear. A trip out to Spotlight this afternoon will see me officially get underway.

How are your plans coming along for Christmas? Planning purchases, busy crafting or a mixture of both?

Saturday, November 3, 2012

Pinterest Challenge #5 - CressHeads


This is my first time participating in the Pinterest challenge. That is unless you count this bird I instagrammed last time?


My Pinterest boards are currently overflowing with things I want to do/try/own. It was hard to pick a project. In the end I went with one that was quick, easy and also entertained the little ones.


My sister had done a similar project a little while back so I knew it was something that would work in our climate.

We gathered our supplies of egg shells, cotton balls, glue, goggly eyes
and of course some cress seeds

The girls carefully stuffed cotton wool into their eggs.

Em need a little help

We then filled them with water. It was only afterwards I realised
you're meant to wet the cotton wool first!

 
Em was very careful but we did end up losing an egg...

Em had enough by this stage so Ava and I sprinkled on some seeds
and decorated the eggs

Now next you're meant to put them somewhere dark so they can sprout and then take them out after a couple of days to keep growing. Well we sort of kind of forgot about ours...

A week later and they were in some desperate need of some TLC!

Luckily after some water, sunshine and a few days R&R
they were looking more like the pinspiration


Bonus: Ava's scary ones looked great for Halloween

Unfortunately Emily's cracked replacement did not turn out so well.
Between failing to really sprout and losing an eye, it was one
sad little egg cup.

I'm calling this a success. Ours definitely don't look as uniform as the original but we had a lot of fun! Who knows we might even try our hands at some old fashioned grass heads next!


The Pinterest Challenge links up lots of great bloggers and ideas. The hosts this time are Katie, Sherry, Sarah and Carmel. I'm a little behind the schedule so there are already heaps of cool projects to go and check out!

Saturday, October 27, 2012

Ottobre 3/09 Velma Vintage Skirt - A Gift To Say Thank You

A little while back we went travelled up north and went to a friend's baptism. After the service there was a gathering at the local park. It was a special occasion and I made the girls new outfits to celebrate.

Unfortunately I didn't get any good photos because
a) Emily kept getting completely dishevelled and
b) About 5 minutes after we arrived Emily went head first into a pond

If there's trouble to be found, Emily will be there! Thankfully all the parents were standing dutifully by their toddlers and the open body of water, I fished her out pretty quickly. I won't say it wasn't heart wrenchingly scary but the nightmares are slowly dissolving...

Moments before...

I was completely unprepared and of course had no spare clothes for Em. Thankfully Kate's mum (Kate is standing to the left of Em in the picture) is a WonderMum and quickly produced towels and spare clothing. She even had spare shoes!

Basically she saved the day and Kate was very sweet making sure that Em was ok. I wanted to say thank you and I know Kate loves pretty things. I decided to make her a skirt to say thanks.

Velma Vintage Skirt - Front

Velma Vintage Skirt - Back


I can't say I'm a particular fan of Ottobre patterns but then that could just be because my sewing skills aren't up to par. I have to re-read the instructions so many times before I can understand them.

I do apologise for the photos. I think improving my skills might be on my to do list for the New Year!

Hopefully Kate and her Mummy will like the outfit and get some good wear out of the skirts :o)